Perks
Perks are drinks sold by machines spread across the map. Each gives a permanent advantage… until you go down.
Buying a perk
- Walk up to the machine and hold F. Your character drinks for 2.6 seconds: you can’t shoot meanwhile, so pick a quiet moment.
- Machines need the Power (see Doors, barriers and Power). The only exception: Second Wind works without Power solo.
- On Discovery difficulty (guided match, newcomer boost), Menhir is given to every player as soon as the Power is on: it doesn’t count as a purchase, and can be bought back at its machine if it drops.
- You can never drink the same perk twice.
- When you look at a machine, a card under the price sums up the perk: what it does in one word (“Health”, “Reload”…), its effect in one line, its priority (Essential, Useful or Special, or Active if you already drank it) and how many perk slots you’re using (for example 1/4).
The perk limit
You can hold 4 perks at once. The machine refuses a fifth one (“Perk limit reached”).
To go past that limit:
- each map hides a secret that adds one perk slot for the whole squad for the match (see The Awakening of Ys and The Last Metro (Nec Mergitur Easter egg));
- the Unquenchable Thirst gumball adds a slot for the rest of the match;
- Mystery Elixir, Helping Hand, Round on the House and Perk Bender give perks beyond the limit.
The perk slot secrets
On Ker-Ys, they are the five stone gulls perched on the rooftops; on Nec Mergitur, the five plaster carrier pigeons. Shoot them all.
The perks
Greatly increases max health.
- Max health 100 → 250 (5 hits instead of 2)
- Cost
- 2,500 points
- Needs power
- Yes
- Maps
- Ker-Ys, Nec Mergitur
| Tier | Augments | Cost | Research |
|---|---|---|---|
| 1 | Granite +50 more max health. | 500 F  Oilcloth ×8  Scrap ×4 | 1 h |
| 2 | Rolling stone Health starts regenerating 1 second sooner after a hit. | 1,800 F Oilcloth ×10 Blessed wax ×3 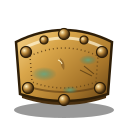 Diving brass ×2 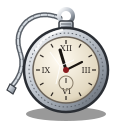 Pocket watch ×2 | 3 h |
| 3 | Last bulwark Once per round, a hit that should have downed you leaves you at 1 health. | 3,500 F Oilcloth ×12Blessed wax ×3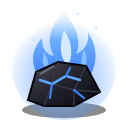 Ankou ember ×4Diving brass ×4Pocket watch ×3 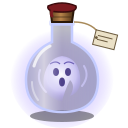 Anaon soul ×1 | 8 h |
Reloads much faster.
- 50% faster reload
- Faster barrier rebuilding
- Faster weapon swap
- Cost
- 3,000 points
- Needs power
- Yes
- Maps
- Ker-Ys, Nec Mergitur
| Tier | Augments | Cost | Research |
|---|---|---|---|
| 1 | Quick hand Your holstered weapon reloads itself after 3 seconds. | 500 F Scrap ×8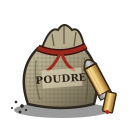 Powder ×4 | 1 h |
| 2 | Hurried step Movement speed +10% for 3 seconds after a reload. | 1,800 F Powder ×10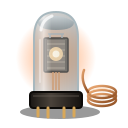 Radio tubes ×3Diving brass ×2 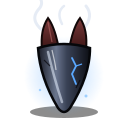 Ankou fang ×2 | 3 h |
| 3 | Hot blood Damage +20% for 4 seconds after reloading an empty mag. | 3,500 F Powder ×12Radio tubes ×3Ankou ember ×4Diving brass ×4Ankou fang ×3 | 8 h |
Fires faster and every bullet counts double.
- Fire rate +33%
- Bullet damage x2
- Cost
- 2,000 points
- Needs power
- Yes
- Maps
- Ker-Ys, Nec Mergitur
| Tier | Augments | Cost | Research |
|---|---|---|---|
| 1 | Hide piercer Bullets go through one more Drowned. | 500 F Powder ×8Scrap ×4 | 1 h |
| 2 | Volley Fire rate +15% more. | 1,800 F Powder ×10Ankou ember ×3Diving brass ×2 Diving porthole ×2 | 3 h |
| 3 | Miser 15% chance not to use up the bullet fired. | 3,500 F Powder ×12Ankou ember ×7Diving brass ×4Diving porthole ×3 Pearl of Ys ×1 | 8 h |
Revives twice as fast. In solo, lets you get back up on your own.
- Revive 2x faster
- Faster health regen
- Solo: self-revive (3 times max)
- Cost
- 1,500 points (solo: 500)
- Needs power
- Yes
- Maps
- Ker-Ys, Nec Mergitur
| Tier | Augments | Cost | Research |
|---|---|---|---|
| 1 | Outstretched hand After a revive (given or received), 3 seconds of invulnerability. | 500 F Oilcloth ×8Scrap ×4 | 1 h |
| 2 | Long arm Double revive range. | 1,800 F Oilcloth ×10Blessed wax ×3Diving brass ×2Pocket watch ×2 | 3 h |
| 3 | Unkillable Solo: one more self-revive. In a team: each revive earns 300 more points. | 3,500 F Oilcloth ×12Blessed wax ×3Ankou ember ×4Diving brass ×4Pocket watch ×3Anaon soul ×1 | 8 h |
Runs longer and faster.
- Movement speed +7%
- Sprint lasts 2x longer
- Faster sprint-to-fire
- Cost
- 2,000 points
- Needs power
- Yes
- Maps
- Ker-Ys, Nec Mergitur
| Tier | Augments | Cost | Research |
|---|---|---|---|
| 1 | Long haul Unlimited sprint. | 500 F Oilcloth ×8Scrap ×4 | 1 h |
| 2 | Will-o’-the-wisp Damage taken −25% while sprinting. | 1,800 F Oilcloth ×10Ankou ember ×3Diving brass ×2Ankou fang ×2 | 3 h |
| 3 | Tailwind Movement speed +7% more. | 3,500 F Oilcloth ×12Ankou ember ×7Diving brass ×4Ankou fang ×3 | 8 h |
Better accuracy and more headshot damage.
- Headshot damage +50%
- Hip-fire spread -40%
- Recoil -15%
- Cost
- 1,500 points
- Needs power
- Yes
- Maps
- Ker-Ys, Nec Mergitur
| Tier | Augments | Cost | Research |
|---|---|---|---|
| 1 | Gull shot Headshot damage +25% more. | 500 F Powder ×8Scrap ×4 | 1 h |
| 2 | Quick glance Aim down sights 30% faster. | 1,800 F Scrap ×10Radio tubes ×3Diving brass ×2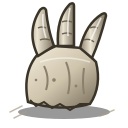 Chimera claw ×2 | 3 h |
| 3 | Hunter Damage +20% against hounds, Divers, chimeras and bosses. | 3,500 F Scrap ×12Radio tubes ×3Ankou ember ×4Diving brass ×4 Chimera shard ×1Chimera claw ×3  Chimera eye ×1 | 8 h |
Lets you carry a third weapon.
- 3rd weapon slot
- The 3rd weapon is lost if you go down
- Cost
- 4,000 points
- Needs power
- Yes
- Maps
- Ker-Ys, Nec Mergitur
| Tier | Augments | Cost | Research |
|---|---|---|---|
| 1 | Sturdy pack The 3rd weapon is no longer lost when you go down. | 500 F Scrap ×8Oilcloth ×4 | 1 h |
| 2 | Bandoliers Ammo reserves +50% for all your weapons. | 1,800 F Powder ×10Ankou ember ×3Diving brass ×2 Stolen ring ×2 | 3 h |
| 3 | Haversack +1 lethal and +1 tactical grenade max. | 3,500 F Powder ×12Ankou ember ×7Diving brass ×4Stolen ring ×3 | 8 h |
Releases an electric blast when you reload.
- Blast around you when reloading
- The emptier the mag, the stronger the blast
- Cost
- 2,000 points
- Needs power
- Yes
- Maps
- Ker-Ys, Nec Mergitur
| Tier | Augments | Cost | Research |
|---|---|---|---|
| 1 | Great fire Blast radius +50%. | 500 F Scrap ×8Powder ×4 | 1 h |
| 2 | Rosary The blast chains to 2 more zombies. | 1,800 F Scrap ×10Radio tubes ×3Diving brass ×2Diving porthole ×2 | 3 h |
| 3 | Riposte When you get hit, a blast goes off too (at most every 10 seconds). | 3,500 F Scrap ×12Radio tubes ×3Ankou ember ×4Diving brass ×4Diving porthole ×3 Ember heart ×1 | 8 h |
Immune to explosions and falls. Slides explode.
- Immune to explosive damage
- Immune to fall damage
- Slide → explosion on impact
- Cost
- 2,000 points
- Needs power
- Yes
- Maps
- Ker-Ys, Nec Mergitur
| Tier | Augments | Cost | Research |
|---|---|---|---|
| 1 | Cannonball The slide explosion is twice as powerful. | 500 F Powder ×8Scrap ×4 | 1 h |
| 2 | Demolitionist Your explosives deal +25% damage. | 1,800 F Powder ×10Ankou ember ×3Diving brass ×2Ankou fang ×2 | 3 h |
| 3 | Crab shell Damage from the Drowned’s hits −15%. | 3,500 F Oilcloth ×12Ankou ember ×7Diving brass ×4Ankou fang ×3 | 8 h |
Secret perk: when you get hit, webs pin down nearby zombies.
- Slowing web when you get hit (15s cooldown)
- Lethal grenades become web grenades
- Your knife slows zombies
- Cost
- 4,000 points
- Needs power
- Yes
- Maps
- Ker-Ys, Nec Mergitur
| Tier | Augments | Cost | Research |
|---|---|---|---|
| 1 | Spinner The web recharges in 8 seconds instead of 15. | 500 F Oilcloth ×8Scrap ×4 | 1 h |
| 2 | Venom Zombies caught in the web lose 5% of their health per second. | 1,800 F Oilcloth ×10Blessed wax ×3Diving brass ×2Stolen ring ×2 | 3 h |
| 3 | Wide web Web radius +50%. | 3,500 F Oilcloth ×12Blessed wax ×3Ankou ember ×4Diving brass ×4Stolen ring ×3 | 8 h |
What the cards don’t say:
- Menhir raises your health to 250 (375 on Easy): from mid-game, you take six hits from a Drowned instead of three (on Normal). It is the most important perk, in a squad as well as solo.
- Second Wind also speeds up health regeneration: it starts sooner and runs 1.5 times faster. It is the reviver’s revive that goes twice as fast: in a squad, whoever picks the others up should drink it.
- St. Elmo’s Fire: the emptier your magazine when you reload, the wider (up to almost 5 m) and stronger the discharge. Reloading again too soon weakens it.
- Carapace: on top of immunity to explosions and falls, sliding as you land from a fall of at least 1.4 m sets off a 5 m explosion around you, stronger the higher the fall.
- Mule: the third weapon is lost when the perk drops (see the augments below).
- Ankou’s Web is the secret perk: its machine only appears after one of the map’s secrets (see The Awakening of Ys and The Last Metro (Nec Mergitur Easter egg)).
Where the machines are
Both maps offer all ten perks:
| Perk | Ker-Ys | Nec Mergitur |
|---|---|---|
| Second Wind | The Quay (starting zone) | Châtelet (starting zone) |
| Quicksilver | Church Street | The Châtelet Corridors (first-class car of the stopped train) |
| Marathon | Shipwreck Beach | The Odéon Tunnel (track workshop) |
| Mule | Saint-Gwénolé Chapel | Saint-Michel |
| Lead Hail | Sailors’ Graveyard | Cité |
| Carapace | The Trenches | The Cité Shaft |
| Menhir | The Bunker | Odéon |
| Lynx Eye | Ker-Ys Lighthouse | The Signal Box |
| St. Elmo’s Fire | Morgane Laboratory | Saint-Michel Substation |
| Ankou’s Web | Dahut’s Cave (secret) | Crypt of the Boatmen (secret) |
Solo and squad
Prices are the same solo and in a squad, except for Second Wind, much cheaper solo. Alone, it changes role: when you go down, you get up on your own after 5 seconds. It works 3 times per match; after that, the machine shows “Used up”. When it gets you up, it is the one that gets used up, and your other perks stay: buy it again after each self-revive. See Down, revive and death.
Losing your perks
- When you are down, your perks drop one by one: the last one you drank drops right away, then another every 10 seconds as long as nobody picks you up (the countdown stops during the revive). Those that have not dropped stay. Details: Down, revive and death.
- Losing Menhir lowers your maximum health; losing Mule makes the third weapon disappear.
- The Granite Heart gumball lets you keep them the next time you go down.
- Completing a map’s main Easter egg makes perks permanent for the whole squad for the rest of the match: you no longer lose them when down.
- Dying makes you lose your perks in every case.
Laboratory augments
In the Hideout, Keller’s Laboratory lets you research perk augments (they are listed in the cards above):
- each perk has 3 augments; research costs francs and materials, and takes real time (1 to 8 hours);
- a perk’s 2nd augment needs the Laboratory at level 2, the 3rd at level 3;
- a finished research equips itself, and all of them can be equipped together, even all three of a perk; in a match, each works as long as you have its perk, on every map. At the laboratory you can remove one, and put it back, whenever you like.
A few very useful augments: Long haul (unlimited sprint), Sturdy pack (the 3rd weapon is no longer lost when down), Last bulwark (one fatal hit per round leaves you at 1 health), Unkillable (one more self-revive solo, 300 points per revive in a squad).
Suggested buying order
The machine cards mark Menhir, Lead Hail and Quicksilver as Essential, plus Second Wind solo. Useful: Marathon, Lynx Eye, Mule and Second Wind in a squad. Special: St. Elmo’s Fire, Carapace and Ankou’s Web.
- Menhir as soon as the Power is on.
- Solo: Second Wind as early as possible (it works without Power). In a squad: Quicksilver or Lead Hail.
- Lead Hail for damage, or Marathon if you play in loops.
- The 4th slot depends on your style: Mule with a wonder weapon, Lynx Eye if you aim for the head, Carapace with explosives or The Bombard, St. Elmo’s Fire to break free.
If Menhir dropped, buy it back first: with 100 health, two full-strength zombie hits are enough to put you down again. Since the last perk you drank drops first, drinking Menhir first protects it the longest.
Checked against the game on November 10, 2026